Charles R. Hill’s Rules for Nitrous Use and Proper Installation
This nitrous technical article was originally put together by Charles R.Hill from Black Halo Racing, we have published it here with the permission of the author with the aim to help outline key areas to address if you are considering a Zex Nitrous install for your Rotary.
The “Rules” As I See Them
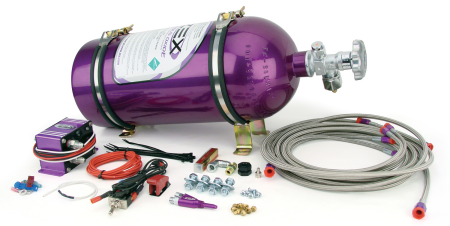
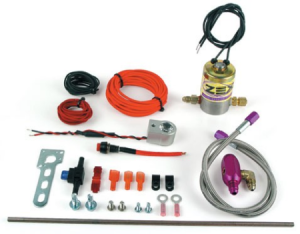
Nitrous oxide systems, particularly the Zex #82021 system, work quite well whether your RX-8 is stock or modified. Most of us are using a 55 h.p. shot. A couple people have been able to get the 65 h.p. jettings to work, as well, but we don’t tend to suggest their use. For those who wonder; the Racing Beat and MazdaManiac’s Cobb AccessPort tuning work well alongside the nitrous and either one actually enhances the effect that the 55 h.p. shot of nitrous has on the Renesis. With the right modifications those who drive the reputed “Kings of the Street” platforms will be surprised to find the RX-8 to not be as slow as they have been told.
First
You must make sure all of your engine’s various systems (ignition, fuel, etc.) are working properly, that you have the latest re-flash offered by Mazda, and no CEL’s (“check engine” lights). Even if your CEL has only blinked, be sure to find out what it was for and that the problem is solved. Make sure that your engine oil is full and clean and the oil and air filters are clean. As long as your factory spark plugs are clean they should be okay. One thing to note is that with the mileage most RX-8 model years are showing, and the fact that the factory ignition coils are quite prone to failure, any kind of power-adder will quickly expose a weak coil. Be sure that you have properly working ignition coils before you even order your nitrous kit. As for spark plugs we have always used the RE-7C-L and RE-9B-T models gapped at the factory spec of .048″, and have had no trouble with the nitrous damaging them. As for the ignition timing advance/curve it need not be changed up until the 65 h.p. jettings. Beyond those levels it is good to have some way to control the ignition system timing during nitrous use.
Black Halo Racing’s Ignition Upgrade System for Your RX-8
Second
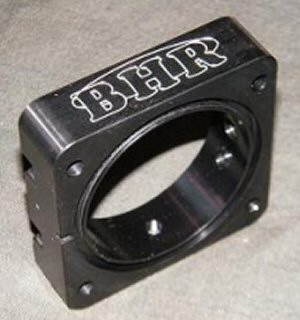
The nozzle placement is VERY important as the RX-8 has an extremely sensitive MAF sensor and high-resolution PCM. If the nitrous nozzle is too close to the MAF sensor there will be erroneous readings sent to the PCM and lean conditions will result. A single nozzle in the third fold back from the front clamp in the flex duct, with a slight upturn of the nozzle to send the plume into the center of the throttle body blade will suffice. Also be sure to use the bulkhead included in the kit, whether installing in the flex duct or in an aftermarket intake tube (with Loctite Blue), with the nut side out (so it doesn’t get sucked into the engine if the worst should happen). The easiest way to drill the hole in the flex duct is with a 3/8″ wood/paddle bit by hand, especially if it is still sharp. Even easier, still, is to use the Black Halo Racing Throttle Body Spacer for an easily reversible installation of your nitrous oxide system.
These can also be found in our Black Halo Racing Shop
Third
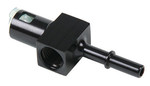 Instead of merely cutting the factory fuel line for the barbed “T” fitting, the safest way to get the fuel to the solenoid/module is to remove the factory fuel line with the red connectors altogether (after waiting about 30 minutes for the fuel pressure to bleed down) and replace the rubber-covered vinyl line with about 18″ of 5/16″ rubber EFI fuel line rated for well over 65 PSI and four clamps available at your local parts store. Trying to simply slip the new fuel line over the factory vinyl line is not the safest way as the new fuel line will slip off the factory vinyl tubing. Trim the new fuel line to the same length as the factory line and route it in the same locator clips/clamps that the factory line came out of for the safest, most stock-appearing installation. To remove the factory line, simply give the red “quick connectors” a 1/4 turn to open the clamp and release them, and firmly pull on the line to remove it from the hard-line. Keep these red connectors and re-use them on the rubber EFI line. Simply push the connectors back in place until you hear a “click” and give it a slight tug to make sure it is locked. Also, you can remove the rubber sheathing from the vinyl line by peeling it off and this will allow you to later use it as a cover/protector for the stainless line to keep it from chafing nearby objects. Another option is to use the Aeromotive Fuel Line Adapter (part #15120) and Aeromotive Plug (#15626), and use the 1/8″ NPT outlet intended for a fuel pressure sensor for your fuel feed to the module.
The Aeromotive Fuel Line Adapter can be found here.
Locate the solenoids or module wherever it may be convenient for you and use the cigarette lighter circuit in the fusebox to power up the system. I loved the way my module was out of view even with the engine cover removed when I mounted it on the underside of the factory intake box, near the tray. Behind the driver’s side “kick panel” is a fuse block which can be removed by pulling it toward you. Looking at the block it is easy to see which wire supplies the lighter with current. It doesn’t matter which side of the fuse you splice into. I fed my 12v+ lead through the hood release cable grommet by using a scratch awl with wire taped to it to pierce the grommet and feed the wire at the same time. For those of you with the A/T application, there is a white plastic plug that caps the hole in the firewall where the clutch hydraulics would be. You can drill a hole, install a grommet, and run your wires through that. Very convenient. If you are using a system that is activated by use of a TPS, the wire that you need to splice into is the bottom wire on the multi-pin connector going to the throttle body as it is plugged in. UPDATE: I now suggest that you first wire in the electronics/module and program the sensor BEFORE you tap into the fuel system. The engine needs to be slightly warmed up in order for the throttle body to receive the WOT voltage, usually 3.8v or more, and by doing the module first you’ll avoid possibly flooding the engine when programming it.
Route the nitrous line from the trunk to the engine compartment by using the empty brake/fuel line channel on the driver’s side of the car, underneath, and “tie-wrap” any loose spots on all of the stainless lines.
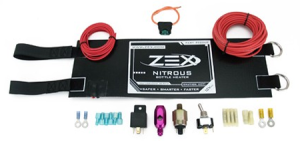
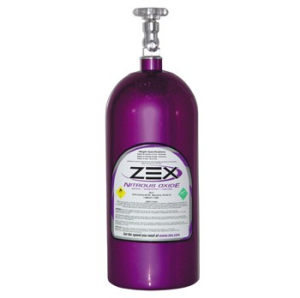
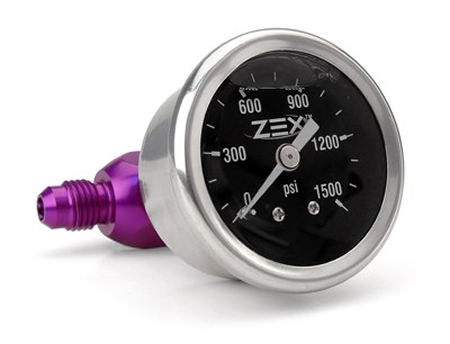
Are tank heaters and purge kits necessary? There is a common misconception that heaters will allow you to get more nitrous out of your tank before a re-fill is necessary. This is not why heaters were invented. Heaters were invented to make nitrous systems more consistent in their use, whether on the street or at the strip, as the ambient temps changed. Nitrous oxide systems are calibrated to operate best with a full tank and line pressure of 950-1,000 p.s.i. but the jetting will be effective between 800-1,100. When the ambient temp drops below the 70-75 degree threshhold the tank pressure will drop by about 100 p.s.i. for each 10 degree drop in ambient. Thus, tank heaters will try and keep the temp around 75-80 degrees on the inside. To do that requires a heater that is very hot to the touch so be careful when yours is turned on. Along those same lines of consistency being the objective, purge kits were invented for drag racers to purge any air bubbles out of their nitrous lines because sanctioned drag races are won or lost in 1/1000 of a second. One small bubble in the nitrous line of a six-second Pro Mod car with a 1,000 h.p. nitrous system will lose the race against a blown or turbocharged Pro Mod car. What I do when I am about to pressurize my system for a night of racing is turn on my tank heater for an hour prior to my expected use and just do a quick 2-3 second nitrous blast before I figure I might race. To shut the system down I turn the heater off, close the tank, and do a couple of full runs to evacuate the nitrous lines. Since I use both fuel and nitrous pressure gauges it is easy to see when the nitrous line is totally purged. Suffice it to say that heaters and purge kits are not necessary, but can be helpful depending on the environment in which you are using nitrous. Remote openers are a great tool to have because you never know when you might come upon an impromptu “comparison” run.
Also keep in mind that neatness counts and it is a good indicator of the attention to detail paid throughout the entire installation process. Whether or not anyone says anything to you, you are being judged by all who look at your engine. This concept was recently discussed and validated by a highly-respected forum vendor/contributor who also believes, as I do, that any fool who can turn wrenches can usually install systems such as nitrous and F/I and(eventually) get them to work. When you pay us to do these installs for you, you are paying for attention to detail that allows your system to work properly the first time and win show awards for thoughtfulness and ingenuity.
The full lineup of Zex Nitrous systems to suit your rotary can be found at our Zex page of the shop.